
Transaction Pro Importer helps businesses around the world eliminate manual data entry into QuickBooks Online. But often we find many businesses don’t take full advantage of the many features and benefits inside QuickBooks Online. The following features, when combined with Transaction Pro, can give you better data, faster.
Class and Location Tracking
If you want to determine where your business is coming from, use the class and location fields on transactions in QuickBooks Online. Keep in mind is that class can be assigned at the individual line level whereas location can only be assigned at the transaction level. Also, these fields are only available in the Plus Edition of QuickBooks Online.
To turn on class and/or location fields:
- Select the gear icon in the upper right of QuickBooks Online
- Under Your Company select Account and Settings
- Select Advanced
- Scroll down to categories and select the pencil icon at the right
- Select either class or location and select save

Custom Fields
Add up to three additional fields to sales transactions and show whether they should appear internally or to the public.
To turn on custom fields:
- Choose the Gear icon > Account and Settings.
- Click Sales on the left and click inside the area entitled Sales Form Content.
3. Click the pencil to the right to turn on Custom fields
4. Once it is turned on you can click on the link to go to the Custom Fields List.
5. Click the green Add field button to add a new custom field. Name the field appropriately and select forms you want it to be included on and whether you want the field to be internal (only displayed in QuickBooks), or public (displayed in QuickBooks and displayed/printed on sales forms).
6. Click Save. These fields will now appear on your sales forms.
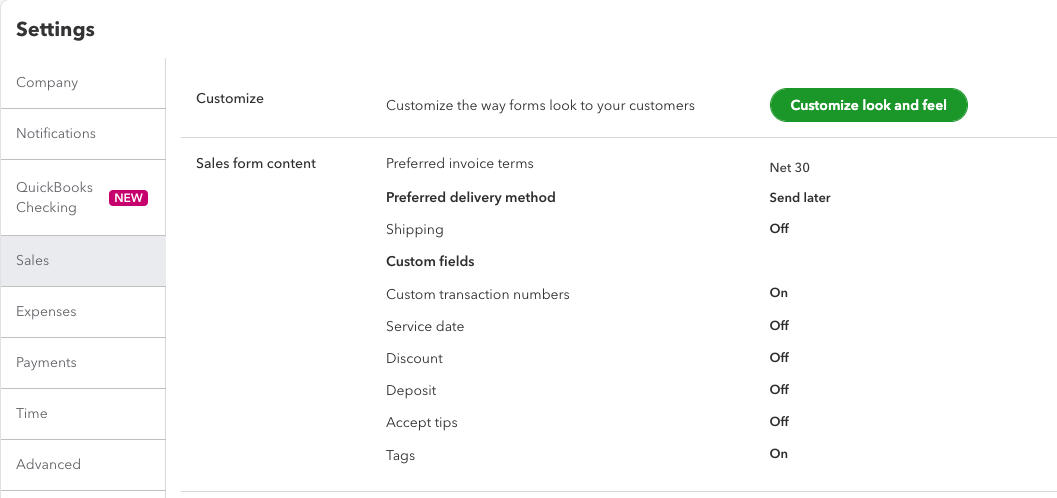
Custom Transaction Numbers
Turn custom transaction numbers on and use your own numbering convention on sales transactions. Activate this in Company Preferences in the Sales Form Section. (See screen shot above in the custom fields section.)
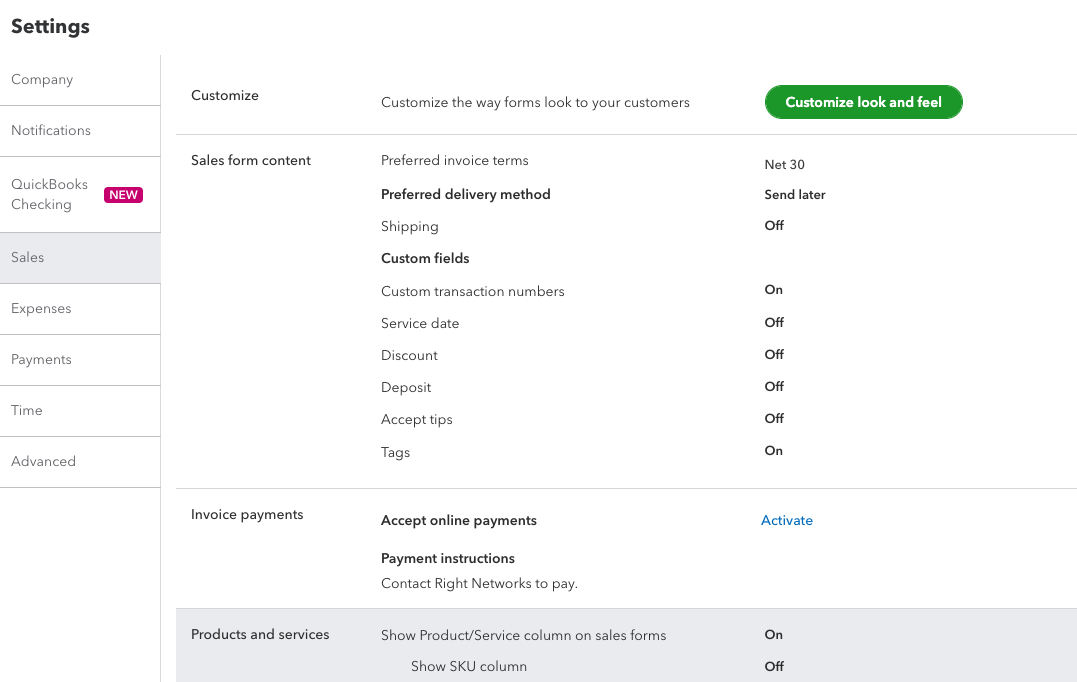
Show SKU Column
Search for an item by its SKU instead of its item name.
To turn on the SKU column:
- Choose the Gear icon > Account and Settings.
- Click Sales on the left and click inside the area entitled Products and Services.
- Select the box to the left of Show SKU column
- Click Save. These fields will now appear on your sales forms.
Sign me out if Inactive
QuickBooks Online will automatically log you out after one hour. This can be inconvenient for those who multitask throughout the day.
To increase the amount of time:
- Choose the Gear icon > Account and Settings.
- Click Advanced on the left and click inside the area entitled Other Preferences.
- Select the box to the right of Sign me out if inactive for
- In the dropdown select 3 hours.