
 Items in QuickBooks are used to post transactions to your chart of accounts and are required on sales transactions and may be used on purchase transactions if you wish to use job costing. This blog post will demonstrate how quick and easy it is to either import new items or update existing items in QuickBooks Pro, Premier, or Enterprise using Transaction Pro Importer. This article will address how to import the following item types:
- Inventory Part
- Non-inventory Part
- Service
- Other Charge
If you do not see your item type listed here below are additional item list imports that are their own separate import type within Transaction Pro Importer:
- Item Assembly
- Item Fixed Asset
- Item Group
- Item Sales Tax
- Price Level List
Here are some common questions that we receive from clients:
Question 1: Can I update information on existing items in QuickBooks.
Yes, you can update most fields on existing items with the exception of accounts. Some common updates include:
- Add or update custom fields
- Add or update price or cost
- Add or update reorder point
- Add or update unit of measure
- Change the status between Active or Inactive
You should map to the following fields when doing updates: Item Name, Item Type and those fields that you wish to have updated.
Question 2: Can I import sub-items?
Yes map Item:sub-item to the QuickBooks field, Item Name, on the Transaction Pro Importer mapping screen.
Question 3: Can I import custom fields?
Yes you can import custom fields but be sure to first enable the Transaction Pro Importer option to enable custom fields on the Advanced Tab.
Question 4: Can I import quantities?
Yes import your item list first and then do an inventory adjustment import.
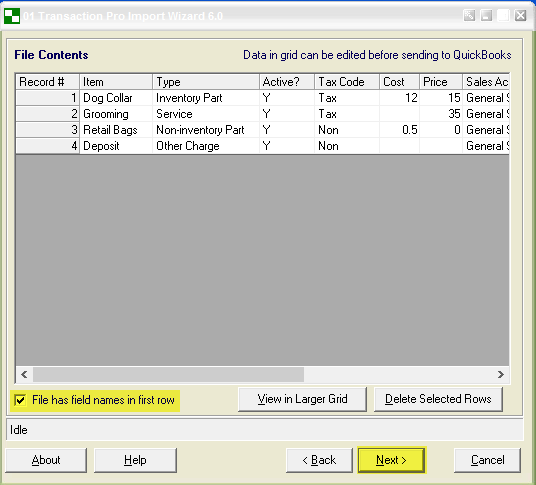
Below is an example of an item list import. Please note that you can also you use our sample import files and maps if you wish and they are located in the following directory on your computer: c:/documents/o1 Transaction Pro Importer 6.0. Below is the file that we are going to import. Please make a note of the header row as this is what we will be using on the mapping screen.

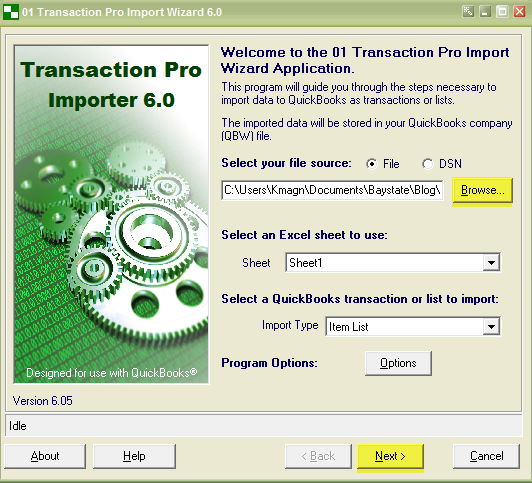
Open up the QuickBooks company file that you wish to import to and then start the Transaction Pro Importer. You will browse for this Excel file and select an import type of Item List and then select next to advance to the next screen of Transaction Pro Importer.
The next screen is the File Contents screen and is where you can view the data in the Excel file that you have selected to import. Since this file has a header row be sure to check the box in the lower left next to: File has field names in first row. Then select next.
The next screen is the Mapping screen. The first column are all the QuickBooks field and any fields in read are required (Item Name, Item Type). You will put your cursor in the middle column and select the column from your import file that you wish to have mapped to that particular QuickBooks field and then select Next.
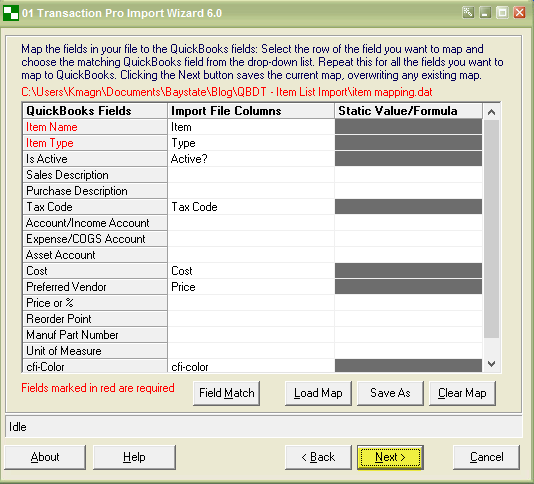
Here is a data dictionary for all the fields on an Item list import.
[table id=70 /]
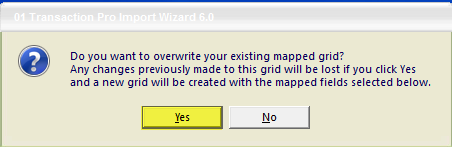
You will then see the following popup and you should select Yes.
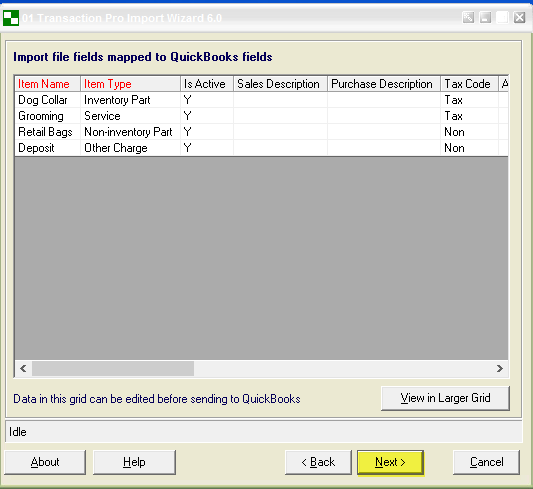
The next screen is the: Import file fields mapped to QuickBooks fields. Please note that this shows how the data in your import file will be married to the QuickBooks fields. Select Next.
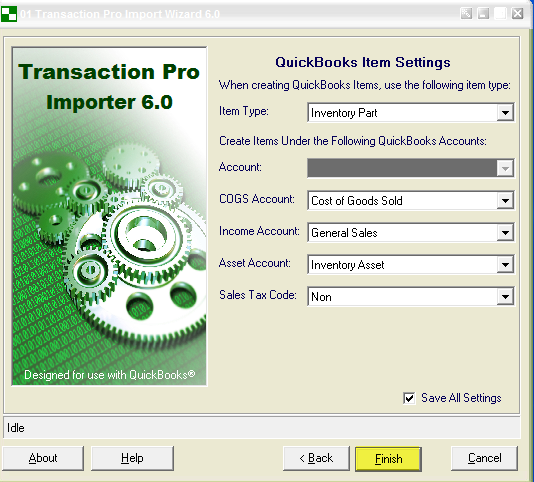
The last screen is the QuickBooks Items Settings screen and the info on this screen is used to set up new items on transactional imports. You will need to complete this screen in order to start the import but the info on this screen will not be ever used on an item list import as we will use the accounts that you have provided in your import file. Select the finish button to start the import.
After import a transaction log will be generated if the Status column says “Imported” than that line imported. If there is any other value in this column then the line did not import and there will be a detailed reason why. You can either save this file or select Cancel.

If you do not already have a copy of Transaction Pro Importer you can request a free trial here.